Skip to content


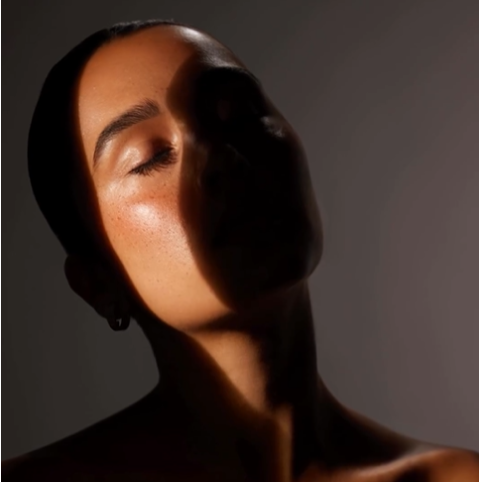
Sculpting your brows can dramatically enhance your look and frame your eyes, giving you a polished appearance even with little makeup. But shaping your brows is an art form, requiring precision and finesse to achieve your own perfect, natural look.
Just as a seasoned chef can take basic ingredients and create a gourmet dish, you can transform your brows from basic to breathtaking with the right knowledge. Follow these tips to sculpt bold, beautiful brows.
Gradient Brows: Soft Start, Bold Finish
This gradient brow technique will create a soft, diffused start that seamlessly transitions into a bolder finish. To get it right, you have to go slowly, making minor adjustments and building in thin layers. Don’t try to achieve your ideal shape and darkness all at once. We suggest taking breaks to view your work in a mirror from different angles so you can make minor tweaks to get the shape just right.
Use The Brow Baby pen to add fuller, symmetrical arches, extend the length or height, or make minor corrections to balance out your brows. Slowly increase pressure and darken your strokes as you move toward the arch and tail.
The ultra-fine tip gives you maximum control and precision. Whether you want to achieve a straight brow or a softly rounded shape, the Brow Baby Pen lets you create your perfect customized brow. This technique grants you the artistic freedom to frame your eyes in a way that complements your unique features and style.
Ombre Brows: Perfect for a Night Out
Ombre brows are ideal if you wish to elevate your look for a special occasion. Using the proper technique and tools, you can sculpt natural-looking brows that make a statement.
This technique provides a gradual, fade-like effect that appears natural yet polished. To achieve the ombre brow look, you’ll use a brow pen in short, hair-like strokes. Start by outlining the shape you want, then fill in the arch and tail of your brows more densely. Softly blend the color towards the front of your brows.
Go slowly to avoid any harsh lines. Keep your strokes light and feathery, mimicking the look of real brow hairs. Brow Baby’s ultra-fine tip makes this easy to accomplish. Once you’ve achieved your desired ombre shade, use a spoolie to brush through and soften your brows. Brushing it this way helps to blend the color for the most natural-looking fade.
Soap Brows: The Brushed-Up Look
For bold, brushed-up brows, use a clear bar of soap to shape and define. Wet a spoolie brush and rub it against the soap. Gently brush your hairs upwards and outwards using the soaped spoolie. This will make your brows appear fuller and more dramatic.
Expert Tips!
- Apply the soaped spoolie in short, light strokes. Start from the inner brow and work your way out.
- Let the soap set for a minute, then use a dry spoolie to brush through and reset any stray hairs.
- For added lift at the arch, apply more soap to that area, and brush upwards. Review your work in a mirror from multiple angles to make sure both sides are complementary.
- Once set, you can trust that your brows will stay in place all day. At night, gently wash the soap from your brows using a mild facial cleanser and lukewarm water.
- Be aware that with overuse, soap brows can cause breakage. Limit use to 2-3 times a week, and condition your brows with a brow oil or serum when not using soap.
- For special occasions, set your soap brows with a clear brow gel for all-day hold without worrying about them falling flat.
- This brow look pairs particularly well with naturally-textured hairstyles or updos. It helps to open up and lift the eye area, creating a wide-eyed and alert appearance. When done right, soap brows can be a stylish statement and a temporary alternative to micro-blading or brow lamination.
Contouring Brows: Highlighting Their Best Features
A little contouring and highlighting can go a long way to accentuate your brows. Here’s how it’s done: apply a lighter shade or highlighter just beneath the brow bone. Then, use a makeup brush to sweep the product below your natural brow in short, light strokes.
Use a brow pen, pencil, or powder slightly darker than your natural brow color to shade the areas under the arch and the tail. Then, apply light and short strokes to add depth and dimension. Extend the shading out and down from the arch to make it appear more pronounced. Buildup gradually, you can always add more, but it’s difficult to take away.
The brow tail, at the outer end of your brow, helps to frame your eye and lift the area altogether. Apply darker shading with light, short strokes from the arch outwards to extend and define the tail. For the most natural look, taper the shading off gradually.
Correcting Mistakes: Every Artist Needs an Eraser
Even the most skilled artists make mistakes. When sculpting your brows, there are a few tricks to help erase minor errors and achieve your perfect arch. One of them is to use a cotton swab dipped in makeup remover to gently erase or adjust any uneven lines or spots. Gently dab at the area you want to fix, being careful not to smudge the rest of your work.
Concealers can also be your best friend. You can use them to clean up the edges and make your brows pop. Apply concealer around the outer edges of your brows with a small angled brush.
For larger mistakes or uneven brows, you may need to start over. Remove all brow products from the area with a makeup remover and a cotton pad or wipe. Remap your arch with small dots or dashes, following your brow bone and the shape you want to achieve.
Remember, eyebrows are sisters, not twins. No two brows are perfectly symmetrical, so aim for balance and a harmonious shape for your face. Minor differences that you see may not even be noticeable to others.
Penciling Perfection: The Art of Illusion
Sculpting the perfect brows is all about creating the illusion of fullness and symmetry. The right tools and techniques can transform your arches from unruly to runway-ready.
Use brow makeup
For spaces and gaps in your brows, use precise applications like the Brow Baby brow pen. Its fine tip allows you to draw hair-like strokes that blend seamlessly. Always use short, upward strokes to make it look real, mimicking the direction of hair growth. When selecting a brow pencil, choose a shade slightly lighter than your natural hair color. For sparse or over-plucked brows, brow pomades and brow powders can also help create fuller-looking arches.
Consider brow extensions
If makeup isn’t cutting it, brow extensions are a more permanent solution to sculpting fuller brows. Brow extensions are synthetic hairs that are bonded to your natural brows to increase their thickness and length. The extensions can last up to 6 weeks before a touch-up is required. Make sure to find an experienced brow extension artist.
Microblading for sparse brows
For those with sparse or uneven brows, microblading may be the answer. Microblading is a semi-permanent tattoo technique where a special hand tool is used to deposit pigment under your skin to mimic the appearance of hair strokes. The results can last 1-3 years before a touch-up is required. Microblading creates natural-looking brows, but remember it is a form of tattooing, so do your research to find a qualified and licensed artist.
Ready to refine your brows?
A good brow shaping may seem insignificant, but you’d be amazed at the difference it can make. With the right tools and techniques, sculpting your brows to perfection is possible — yes, even daily!
Don’t get discouraged if you need a few practice runs to master the art of brow sculpting. Even professional makeup artists need to start somewhere. With regular practice and the support of experts from Brow Baby, brow sculpting can become second nature. What are you waiting for?